
Blog
9.7.4 Leash CodeHS Answers: How to Make the Ball Follow the Mouse

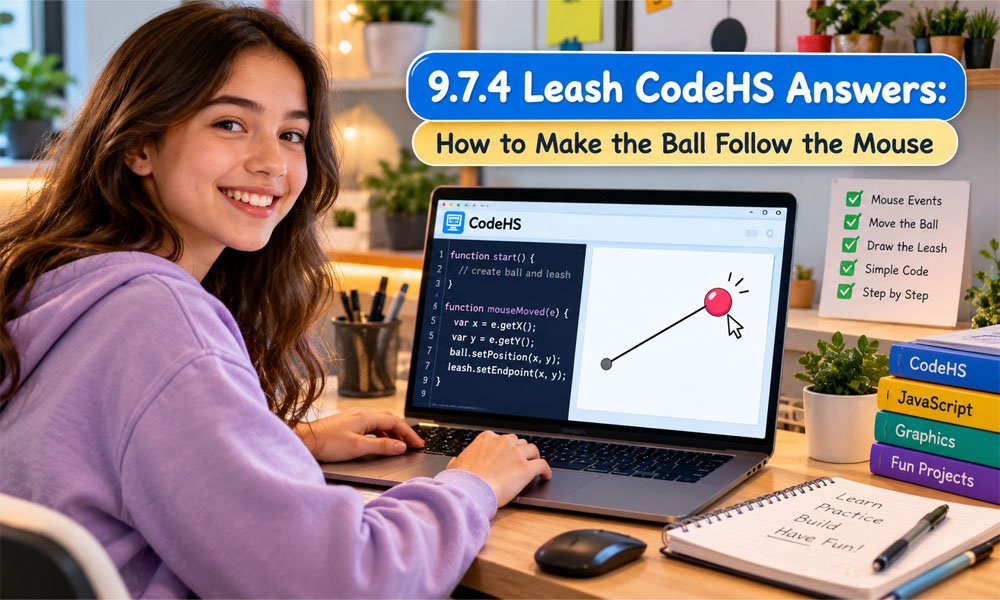
The 9.7.4 Leash CodeHS answers exercise may look hard when you first see it. You have a ball, a line, and a mouse to control. But the main idea is very simple once you understand each part.
In this CodeHS task, a ball follows your mouse across the screen. A line connects the ball to the center of the canvas. One end stays in the middle, while the other end follows the moving ball.
In this guide, we will explain the code in very easy words. We will look at the ball, line, canvas center, and mouse movement. We will also explain why each part of the code is needed.
What Is the 9.7.4 Leash CodeHS Exercise?
The Leash exercise is a JavaScript graphics task in CodeHS. It teaches you how objects can move when a person moves the mouse. The program does not just print words. You can see the action on the canvas.
The main object is a circle that acts like a ball. There is also a line that acts like a leash. At first, the ball and both ends of the line can start in the center.
When you move your mouse, the ball follows it. One end of the leash follows the ball too. The other end stays in the center. This simple action creates the leash effect you see on the screen.
What Do You Need to Build in 9.7.4 Leash CodeHS?
The 9.7.4 Leash CodeHS answers task has two main graphic objects. First, you need a Circle. This circle becomes the ball. Next, you need a Line. This line becomes the leash connected to it.
Both objects should begin near the middle of the canvas. You can find that point by using the width and height of the screen. This is much better than guessing where the middle might be.
After that, you need to watch the mouse. Each time the mouse moves, the ball should move to the same place. The moving end of the line should also go there. The other end must stay still.
9.7.4 Leash CodeHS Answers: Complete Working Code
A clean solution creates the ball and leash one time. It then moves those same objects when the mouse moves. This keeps the program short, clean, and much easier to understand.
Here is the main idea of the code:
var BALL_RADIUS = 30;
var ball;
var leash;

function start() {
    var centerX = getWidth() / 2;
    var centerY = getHeight() / 2;

    leash = new Line(centerX, centerY, centerX, centerY);
    add(leash);

    ball = new Circle(BALL_RADIUS);
    ball.setPosition(centerX, centerY);
    ball.setColor(Color.yellow);
    add(ball);

    mouseMoveMethod(moveLeash);
}

function moveLeash(e) {
    ball.setPosition(e.getX(), e.getY());
    leash.setEndpoint(e.getX(), e.getY());
}
The line is added before the ball in this example. This can help the ball appear above the line. The mouse function then moves the ball and the end of the leash to the same place.
How the 9.7.4 Leash CodeHS Answer Works
The program begins with start(). Think of this function as the setup step. It finds the middle of the canvas. Then it creates the line and ball and places them on the screen.
Next, mouseMoveMethod(moveLeash) tells CodeHS to watch for mouse movement. The program can now wait. It does not need to keep making new balls or new lines while it waits.
When you move your mouse, CodeHS runs moveLeash(e). The program gets the new mouse position. It moves the ball there and changes the line endpoint to the same spot. This happens again each time your mouse moves.
Why Ball and Line Variables Are Important
Look near the top of the 9.7.4 Leash CodeHS answers code. You will see var ball; and var leash;. They are placed outside the functions so more than one function can use the same objects.
The start() function creates these objects. Later, moveLeash() needs to move them. If the functions cannot reach the same ball and leash, mouse movement may not work as planned.
This is also why you should not keep making a new Circle inside the mouse function. You already have a ball. You only need to change where that same ball sits on the canvas.
Finding the Center in 9.7.4 Leash CodeHS
Finding the middle of the canvas is easy. The program uses getWidth() to learn how wide the canvas is. It divides that number by two to find the middle from left to right.
The same idea works for height. getHeight() tells us how tall the canvas is. Dividing it by two finds the middle from top to bottom. These two values give us the center point.
This method is better than writing a fixed point like 200, 200. A CodeHS canvas may have a different size. Using its real width and height lets the program find the correct center on its own.
How to Create the Ball in 9.7.4 Leash CodeHS
The ball begins with new Circle(BALL_RADIUS). In our example, the radius is 30. You can think of the radius as a simple value that controls how large the circle appears.
Next, ball.setPosition(centerX, centerY) puts the ball in the middle. ball.setColor(Color.yellow) makes it yellow. Finally, add(ball) places the ball on the visible graphics canvas.
Creating the ball is only the first step. We still need to make it follow the mouse.
How to Create and Move the Leash Line
The leash is made with a Line object. A line needs four values. These values tell CodeHS where the line starts and where it ends. At first, both ends can sit in the center of the canvas.
The starting point should stay in the center. The other point needs to move with the ball. This is why setEndpoint() is useful. It changes the end of the line without moving its fixed starting point.
This is an important part of 9.7.4 Leash CodeHS answers. Think of the center point as a hook on a wall. The line is tied to that hook, while the ball can move anywhere around it.
How mouseMoveMethod Works in 9.7.4 Leash CodeHS
The ball cannot follow the mouse unless the program knows when the mouse moves. This is where mouseMoveMethod() helps. It tells CodeHS to watch the mouse and run a function when movement happens.
For example, mouseMoveMethod(moveLeash) tells CodeHS to use the moveLeash function. You should pass the function name without adding () after it. CodeHS will call the function when the mouse actually moves.
The function receives an event, often called e. We can use e.getX() to get the mouse X point. We use e.getY() to get its Y point. Together, these tell us exactly where the mouse is.
How the Ball Follows the Mouse
Now we reach the main action in the 9.7.4 Leash CodeHS answers solution. Every time the mouse moves, the program gets its X and Y points. The ball then moves to those same points.
The leash endpoint also gets the same X and Y values. This is the key idea. Since the ball and line endpoint always share one location, they look like they are connected as they move.
Imagine moving your mouse toward the top-right corner. The ball travels there. The end of the line follows it. But the other end stays in the center. That simple movement creates the full leash effect.
Common 9.7.4 Leash CodeHS Problems and Fixes
Sometimes the code looks right, but the ball does not move. First, check mouseMoveMethod(). Make sure you passed the correct function name. Also check that your ball and leash variables can be used inside the movement function.
What if the ball moves but the leash stays still? Check setEndpoint(). The line endpoint must use the same e.getX() and e.getY() values as the ball. Different values can make the two objects look separated.
You may also see the line drawn over the ball. Drawing order can cause this. Try adding the leash first and the ball second. Also check spelling carefully. JavaScript cares about capital letters, so getX() and getx() are not the same.
How to Test Your 9.7.4 Leash CodeHS Answer
Testing is more than checking if the program starts. First, look at the opening screen. The ball should begin in the center. The leash may be hard to see at first because both ends begin at the same point.
Next, slowly move your mouse around the canvas. The ball should follow it. The moving end of the line should stay with the ball. The starting end of the line should remain fixed in the middle.
Try all four corners too. This is a good way to find small mistakes. If the ball only moves from side to side, for example, you may have forgotten to update its Y point.
9.7.4 Leash CodeHS vs Other Leash Versions
You may search for 9.7.4 Leash CodeHS answers and find the same exercise under another number. This can happen because CodeHS courses and lesson layouts may not always use the same numbering.
An older guide may call a similar task 4.7.4 Leash. Another course may place the activity somewhere else. So do not judge an answer only by the lesson number shown on another website.
Instead, read your own assignment. Does it ask for a ball that follows the mouse? Does a line stay fixed at one end? If yes, the same basic graphics idea may apply. Always follow the exact directions shown in your course.
What 9.7.4 Leash CodeHS Teaches You
This small exercise teaches more than moving a yellow circle. It shows you how a program can react to something a person does. The mouse moves, an event happens, and your program responds right away.
You also learn about X and Y points. These points tell the program where an object belongs on the canvas. The ball and leash look connected because both use the same moving X and Y position.
These skills can help with later CodeHS work. Mouse events can be used in games, drawing tools, buttons, and moving objects. Learning this simple Leash program gives you a good base for harder graphics tasks.
Conclusion
The 9.7.4 Leash CodeHS answers exercise becomes much easier when you break it into small parts. First, create the ball and line. Put them in the center. Then watch for mouse movement.
When the mouse moves, send its X and Y points to the ball and the leash endpoint. Keep the other end of the line fixed. There is no need to keep making new circles or lines.
Most of all, try to understand why each part works. Once mouse events, coordinates, and moving objects make sense, many other CodeHS graphics tasks will feel much easier to solve.
(FAQs)
What is 9.7.4 Leash CodeHS?
The 9.7.4 Leash exercise is a JavaScript graphics task. You create a ball and a line. The ball follows the mouse, while one end of the line stays fixed in the center.
What is the main 9.7.4 Leash CodeHS answer?
The main idea is to create one Circle and one Line. Use mouseMoveMethod() to watch the mouse. Then move the ball and line endpoint to the same mouse X and Y position.
Why does the ball not follow my mouse?
First, check your mouseMoveMethod() code. Make sure it receives the correct function name. Inside that function, use e.getX() and e.getY() to get the current mouse position and move the ball.
Why is the leash line not moving?
The line may not move if you use the wrong method. Use setEndpoint() to move the free end of the leash. Give it the same X and Y values that you give the ball.
Why does one end of the leash stay in the center?
That is how the leash effect works. The starting point of the line stays fixed in the canvas center. Only the other endpoint moves with the mouse and ball.
Why are ball and leash variables global?
The objects are created inside start(), but another function needs to move them later. Global variables let both functions work with the same ball and leash instead of creating new objects each time.
Why does the line appear on top of the ball?
This can happen because of drawing order. Try adding the line to the canvas first. Then add the ball. This can make the ball appear above the line and give the graphic a cleaner look.
What do e.getX() and e.getY() mean?
e.getX() gives the mouse position from left to right. e.getY() gives its position from top to bottom. Together, they tell the program exactly where the mouse is on the canvas.
Why should I not create a new ball every time the mouse moves?
You only need one ball. Creating a new Circle for every mouse movement can leave many circles on the screen. Instead, create the ball once and use setPosition() to move that same object.
What does the 9.7.4 Leash CodeHS exercise teach?
The exercise teaches mouse events, X and Y points, graphics objects, and movement. It also shows how two objects can move together. These ideas are useful later for games, drawing tools, and other interactive programs.
Continue reading: RashyWings.com: A Complete Beginner’s Guide to the Website

Kali Uchis Net Worth: How the Grammy Winner Built Her Fortune

Lauren Alaina Net Worth: Her Salary, Career, and Biggest Income Sources

Azzi Fudd Net Worth: Career, Salary, Sponsorships, and Financial Growth

Ali Siddiq Net Worth: The Story Behind His Money, Fame, and Comedy Career

Chrissy Teigen Net Worth: Modeling Career, Business, Income, and Success Story

Lil Dicky Net Worth: Career, Earnings, House, and Amazing Success

NJuelz Santana Net Worth: How the Rap Star Built His Money and Fame

CJ So Cool Net Worth: His Earnings, Family, and Life Today

Cameron Diaz Net Worth: Movies, Salary, Homes, and More

Innovations in Floristry: BOPP Matte Film as the Go-To Material for Modern Flower Packaging

Arbello Barroso: Where Is Luciana Barroso’s Ex-Husband Now?

Suzanne Bukinik: Everything to Know About Brad Falchuk’s Ex-Wife

Maria Jesus Pariente: What We Know About Enzo Maresca’s Wife

Who Is Astrid Menks? All About Warren Buffett’s Wife

Who Is April Dubois? All About Wesley Snipes’ Ex-Wife

Berkin Gökbudak: What to Know About Aslı Enver’s Husband

Who Is Kate Connelly? All About Bobby Flay’s Ex-Wife

Erika Riker: Where Is Randy Jackson’s Ex-Wife Now?

Patricia Rahman: The Full Story of James Marsters’ Ex-Wife

Andrea Sarubbi: Who Is Luke Kirby’s Wife and What Does She Do?
Kali Uchis Net Worth: How the Grammy Winner Built Her Fortune
Lauren Alaina Net Worth: Her Salary, Career, and Biggest Income Sources
Azzi Fudd Net Worth: Career, Salary, Sponsorships, and Financial Growth
Ali Siddiq Net Worth: The Story Behind His Money, Fame, and Comedy Career
Chrissy Teigen Net Worth: Modeling Career, Business, Income, and Success Story
Lil Dicky Net Worth: Career, Earnings, House, and Amazing Success
NJuelz Santana Net Worth: How the Rap Star Built His Money and Fame
CJ So Cool Net Worth: His Earnings, Family, and Life Today
Cameron Diaz Net Worth: Movies, Salary, Homes, and More
Innovations in Floristry: BOPP Matte Film as the Go-To Material for Modern Flower Packaging
-

 News1 month ago
Who Is Gigi Yallouz? Meet Owain Yeoman’s Wife and Jewelry Designer
-

 News2 months ago
Rajesh Nihalani: What We Know About Archie Panjabi’s Husband
-

 News2 months ago
Stephan Farmiga: Everything to Know About Vera Farmiga’s Brother
-

 News2 months ago
Tara Nadella: What We Know About Satya Nadella’s Daughter