Technology
Turn Your Creative Ideas Into Products With a Desktop Laser Engraver

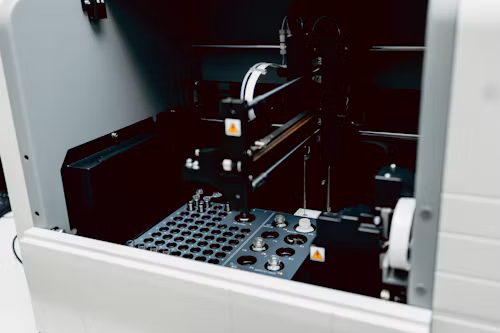
A creative idea can become a useful product with the right tools. You might want to make personalized gifts, wooden signs, leather accessories, or custom decorations. Laser engraving makes these projects easier to produce with consistent details. It also gives hobbyists and small businesses more control over their designs.
A desktop laser engraver provides a practical way to handle these tasks in a workshop or home studio. It uses a focused beam to mark, engrave, or cut suitable materials. Users can prepare artwork on a computer and send it to the machine. The laser then follows the design and reproduces it on the selected surface.
The results depend on several factors. Laser power, material type, focus, working area, and software settings all affect the finished product. Understanding these details helps you select equipment that matches your creative plans.
Creative Projects You Can Make With a Desktop Laser Engraver
A laser engraving machine can support several types of creative work. You can use it for personal projects, custom orders, and small production runs. The important step is choosing materials that match the machine's capabilities.
Here are some practical project ideas.
1. Personalized Wooden Products
Wood is a popular material for laser engraving. You can create nameplates, photo frames, wall decorations, signs, and custom gift boxes. Engraved patterns also add detail to wooden organizers and household accessories.
Different wood types produce different results. Basswood is useful for many beginner projects because it has a relatively even surface. Plywood, bamboo, and hardwood can also work, depending on their composition and thickness. Test a small section before processing the complete item.
2. Custom Leather Accessories
Leather engraving creates opportunities for personalized products. You can add initials, logos, decorative patterns, and simple artwork to suitable leather surfaces. Wallets, keychains, notebooks, and small accessories are common examples.
However, leather types require different settings. Natural leather and synthetic alternatives may react differently to heat. Always confirm the material composition before engraving. Avoid materials that release harmful fumes when heated.
3. Decorative Acrylic Designs
Acrylic is another useful material for creative projects. It can be used for display signs, decorative panels, nameplates, and custom labels. However, laser compatibility depends on the acrylic type and laser technology.
Blue diode lasers generally struggle with transparent acrylic because much of the beam passes through it. Dark or opaque acrylic may work better. CO2 machines are generally more suitable for clear acrylic cutting.
4. Customized Gifts and Accessories
Small personalized products can make practical gifts. You can engrave names, dates, illustrations, and short messages onto compatible items. Examples include wooden coasters, bookmarks, decorative boxes, and selected coated accessories.
These projects also allow creators to experiment with different designs. A single digital file can produce multiple versions with different names or patterns. This makes customized production easier to organize.
Handheld vs. Desktop Laser Engravers: Which One Fits Your Work?
Both machine types perform engraving tasks, but their working methods are different. A handheld laser engraver offers more freedom when working with large or fixed objects, while a desktop diode laser engraver provides controlled movement for detailed and repeatable designs.
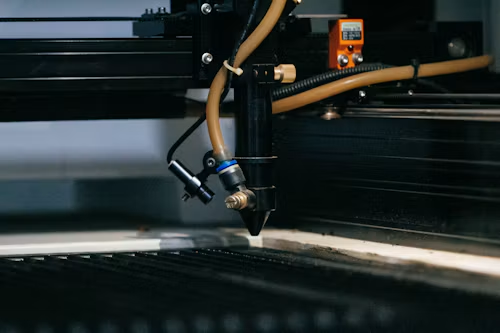
A handheld device moves across the target surface or is positioned according to its design. This can help with certain repair, maintenance, and on-site marking tasks.
A desktop laser engraver uses a fixed frame and controlled movement system. You place the material inside its working area and position the design through software. The machine follows the programmed path without requiring manual movement during engraving.
- The main differences include:
- Feature
- Handheld Model
- Desktop Model
- Movement
- Manually positioned
- Controlled by machine
- Working area
- Depends on handling and setup
- Defined by the frame
- Repeatability
- Depends on operator control
- Easier to reproduce
- Best suited for
- Selected on-site tasks
- Detailed designs and repeated projects
- Setup
- Portable working arrangement
- Fixed workspace
Choose handheld equipment when flexibility and access matter most. Desktop equipment is generally more suitable for repeatable artwork, small product batches, and detailed designs.
Diode vs. CO2 Lasers: Understanding the Main Differences
Laser technology plays an important role in material compatibility. Diode and CO2 systems use different light sources and wavelengths. This affects how they interact with different surfaces.
A diode laser produces light through a semiconductor source. Many desktop models use blue light around 450 to 455 nm. They work well with materials such as wood, leather, paper, and certain dark acrylics.
CO2 lasers use a gas-filled tube and typically operate at a wavelength of approximately 10.6 micrometers. They are suitable for cutting and engraving many nonmetal materials. They also handle clear acrylic more effectively than standard blue diode systems.
- Consider these differences before selecting equipment:
- Factor
- Diode Laser
- CO2 Laser
- Light source
- Semiconductor
- Gas laser tube
- Common applications
- Wood, leather, paper
- Wood, acrylic, leather
- Clear acrylic
- Generally unsuitable
- Suitable
- Machine size
- Often compact
- Varies, often larger
- Cooling
- Usually simpler
- Often requires cooling
- Main advantage
- Accessible desktop engraving
- Strong nonmetal cutting capability
Neither technology suits every project. A diode machine can be a sensible choice for detailed craft work. A CO2 system may be more appropriate when clear acrylic and frequent sheet cutting are important.
How to Choose the Right Diode Laser Module for DIY Projects
Building a DIY engraving machine requires more than selecting a laser module. You must consider the complete mechanical and electrical setup. The module should work with your frame, controller, software, and intended materials.
Start with these important factors.
Optical output power: Check the actual laser output rather than relying on electrical input ratings. Higher optical power can improve cutting performance and reduce the number of passes required. However, detailed engraving also depends on focus and spot size.
Wavelength: Most common blue diode modules operate around 450 to 455 nm. This wavelength works with several organic and opaque materials. Check material compatibility before starting a project.
Spot size: A smaller focused spot can produce finer details. It is useful for text, illustrations, and intricate patterns. However, mechanical stability and accurate focusing also affect the result.
Cooling system: Some modules use passive cooling, while others include fans or additional cooling arrangements. Follow the manufacturer's operating requirements to prevent overheating.
Controller compatibility: Check whether the module supports your controller and its electrical requirements. Confirm the required voltage, current, wiring, and control signals before connecting anything.
Air assist: Air assist directs airflow toward the cutting area. It helps clear smoke and debris from the laser path. This can improve edge quality and reduce residue on suitable materials.
Before purchasing a module, consider your most common projects. A wood engraving setup may need different specifications from a machine designed for regular sheet cutting.
Machine Features That Make Creative Work Easier
A good laser engraving setup needs several components to work together. The laser source receives attention, but the supporting features also influence the final results.
Working Area and Frame Stability
The working area determines the maximum material dimensions that fit within the machine's operating space. A smaller bed may suit keychains, coasters, and small decorations. Larger projects require more space or a suitable pass-through arrangement.
Frame stability is equally important. A rigid aluminum structure helps reduce unwanted movement during operation. This supports consistent engraving and cleaner edges, particularly when working with detailed patterns.
Control Systems and Software Support
Software connects your digital artwork with the engraving machine. You can prepare text, import images, adjust dimensions, and arrange multiple designs before processing.
Some machines support programs such as LaserGRBL and LightBurn. Compatibility varies by controller and operating system. Check supported file formats and software requirements before choosing a machine.
Safety and Smoke Management
Laser engraving produces heat, smoke, and airborne particles. An enclosure can help contain direct laser exposure and reduce the spread of smoke. Features such as emergency stops, protective interlocks, and limit switches also support safer operation.
However, an enclosure does not remove every hazard. You still need suitable ventilation or filtration. Never leave an operating laser unattended, and never process PVC or unknown materials that could release toxic fumes.
What to Look for in a Complete Laser Engraving and CNC Setup
A useful engraving machine combines several practical features. Look at its laser output, working dimensions, motion system, control board, software support, and protective structure.
For example, a compact enclosed diode system may offer a 10W optical output, a 300 × 300 mm working area, and a maximum engraving speed of 7,000 mm/min. A fine laser spot can help reproduce small details, while a stable aluminum frame supports controlled movement.
Other useful features include adjustable focus, emergency stopping, protective covers, and compatibility with different design programs. Some setups also support offline operation or mobile applications.
CNC machines use programmed movement to control cutting or engraving tools. Their capabilities depend on the installed tool and machine configuration. Laser CNC systems use a laser module, while traditional CNC routers use rotating cutting tools. Both can support digital production, but they handle materials differently.
When comparing equipment, focus on specifications that directly support your planned work. Avoid selecting a machine simply because its feature list looks longer.
Prepare Your First Laser Engraving Project
Good preparation can prevent wasted materials and inconsistent results. Start with a simple design instead of immediately attempting a complicated pattern.
- Follow this basic process:
- Select a material that the machine supports.
- Prepare your artwork in compatible software.
- Measure the material and check the available working area.
- Set the correct focus and secure the workpiece.
- Run a small test using suitable power and speed settings.
- Inspect the result and adjust the settings if necessary.
- Complete the final engraving while monitoring the machine.
Keep a record of successful settings for different materials. This makes future projects easier to repeat and helps you understand how your machine behaves.
Choose Equipment That Supports Your Creative Goals
The right equipment should match your projects, workspace, and experience level. A compact diode machine can support many engraving tasks without requiring a large workshop. A CO2 system may be more appropriate when your work involves clear acrylic or frequent nonmetal cutting.
Think about the materials you use most often. Then compare laser output, working area, software compatibility, frame stability, and safety features. These details matter more than a single specification.
A well-planned desktop engraving setup gives you room to experiment with designs and develop practical products. Whether you are making personalized gifts, decorative pieces, or custom accessories, the best starting point is equipment that matches the work you actually want to produce.
Frequently Asked Questions
1. What can a desktop laser engraver make?
It can produce wooden signs, personalized gifts, leather accessories, decorative panels, labels, and other compatible engraved or cut products.
2. Is a diode laser engraver suitable for beginners?
Yes. It can be a practical starting point for wood, leather, paper, and selected opaque materials. Beginners should learn focusing, material testing, ventilation, and laser safety first.
3. Can a diode laser cut metal?
Standard blue diode machines cannot cut bare metal. Some can mark coated or treated metal surfaces, but direct metal processing requires suitable specialized equipment.
4. Is a CO2 laser better than a diode laser?
It depends on the material. CO2 lasers are generally better for clear acrylic and substantial nonmetal cutting. Diode lasers are useful for compact engraving projects involving wood and leather.
5. What safety features should a laser engraver have?
Look for a suitable enclosure, protective interlocks, emergency stop, stable construction, and appropriate smoke extraction. Always follow the machine's safety instructions.

Turn Your Creative Ideas Into Products With a Desktop Laser Engraver

6 At-Home LED Face Masks Compared on Wavelength, Fit and Session Time

Where Clutter Actually Comes From in a Small Home

6 Korean Barrier Repair Products Compared on Ingredients and Texture

Practical Desk Accessories for a More Organized Workspace

Solar Security Cameras Compared: Power, Signal and Night Range

The Best Google Shopping Management Agencies in 2026

7 Rare Honeys Worth Trying and Where They CoFrom

Used OEM or Aftermarket Car Parts Compared Across Five Secondhand Sources

What Makes Gold Prices Rise While Other Markets Fall?

How to Make Kofta Kebabs at Home Without Overthinking It

Oleksandra Zelenska: Who Is Volodymyr Zelensky’s Daughter?

Ethan Klein Net Worth: YouTube H3 Podcast and His Wealth

Patricia Azarcoya Schneider: Everything You Need to Know About Rob Schneider’s Wife

Who Is Angel Iris Murphy Brown? All About Mel B’s Child

Rebecca Liddicoat: What Happened to RG3’s First Wife After Divorce?

Kai Dugan: Everything to Know About Jennifer Connelly’s Son

Beyond the Interior: Home Improvements That Transform Your Entire Property

Nicole Aniston Net Worth: Career, Income, and Wealth Explained

Vivian Jenna Wilson Net Worth: How Elon Musk’s Daughter Makes Her Own Money
Turn Your Creative Ideas Into Products With a Desktop Laser Engraver
6 At-Home LED Face Masks Compared on Wavelength, Fit and Session Time
Where Clutter Actually Comes From in a Small Home
6 Korean Barrier Repair Products Compared on Ingredients and Texture
Practical Desk Accessories for a More Organized Workspace
Solar Security Cameras Compared: Power, Signal and Night Range
The Best Google Shopping Management Agencies in 2026
7 Rare Honeys Worth Trying and Where They CoFrom
Used OEM or Aftermarket Car Parts Compared Across Five Secondhand Sources